
How to Make an AI Short Film with Frameliq, Step by Step
Learn how to make an AI short film with Frameliq. Follow this visual tutorial from story idea and storyboard to video, sound, lip sync and export.
An AI short film gets much easier when each decision has a clear place. Write the story first. Plan the frames next. Generate and edit video only after the shots make sense. Frameliq organizes that process into three main stages: Writer, Storyboard and Composer.
This tutorial shows the complete path from an idea or imported screenplay to a finished video. You can skip the optional Shot Designer unless a scene needs a controlled transition between keyframes.
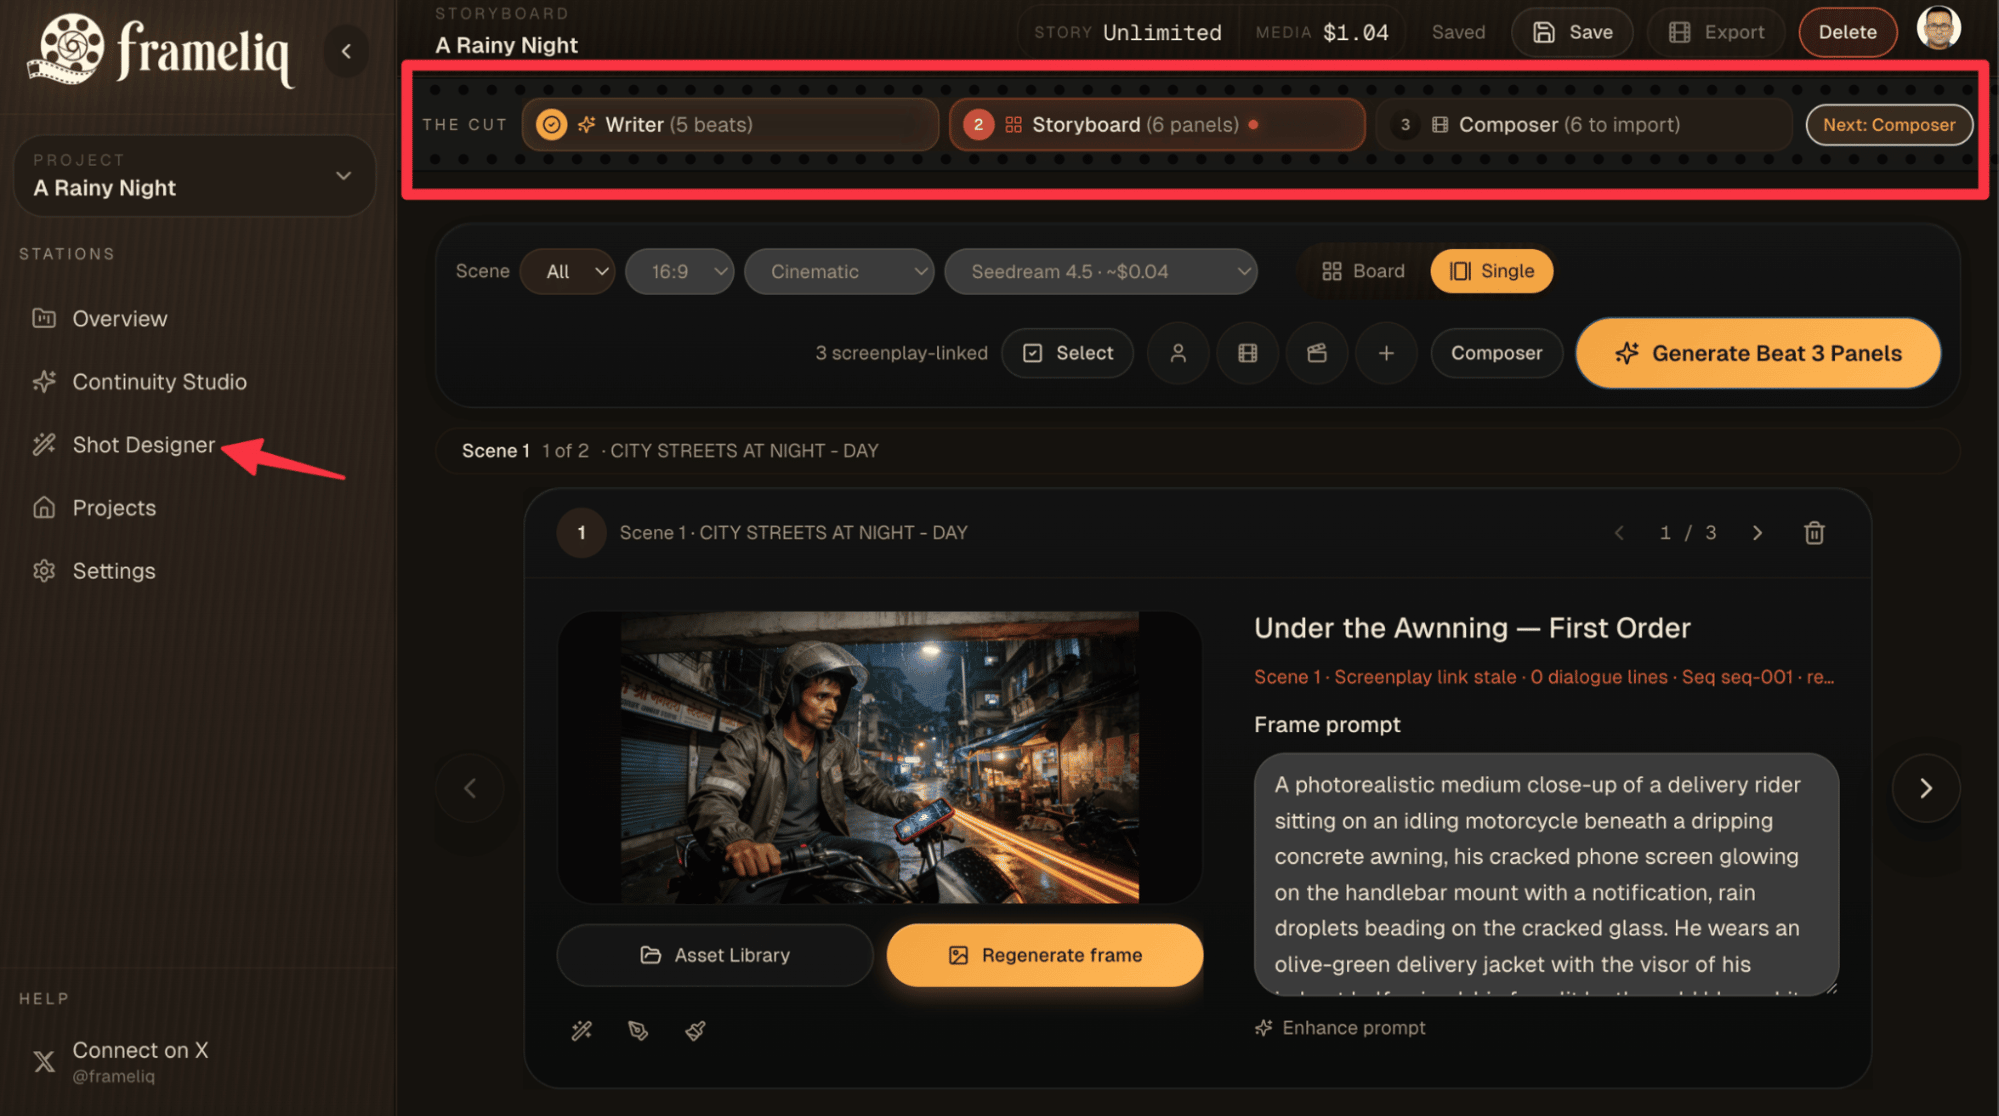
1. Start your AI film in Writer
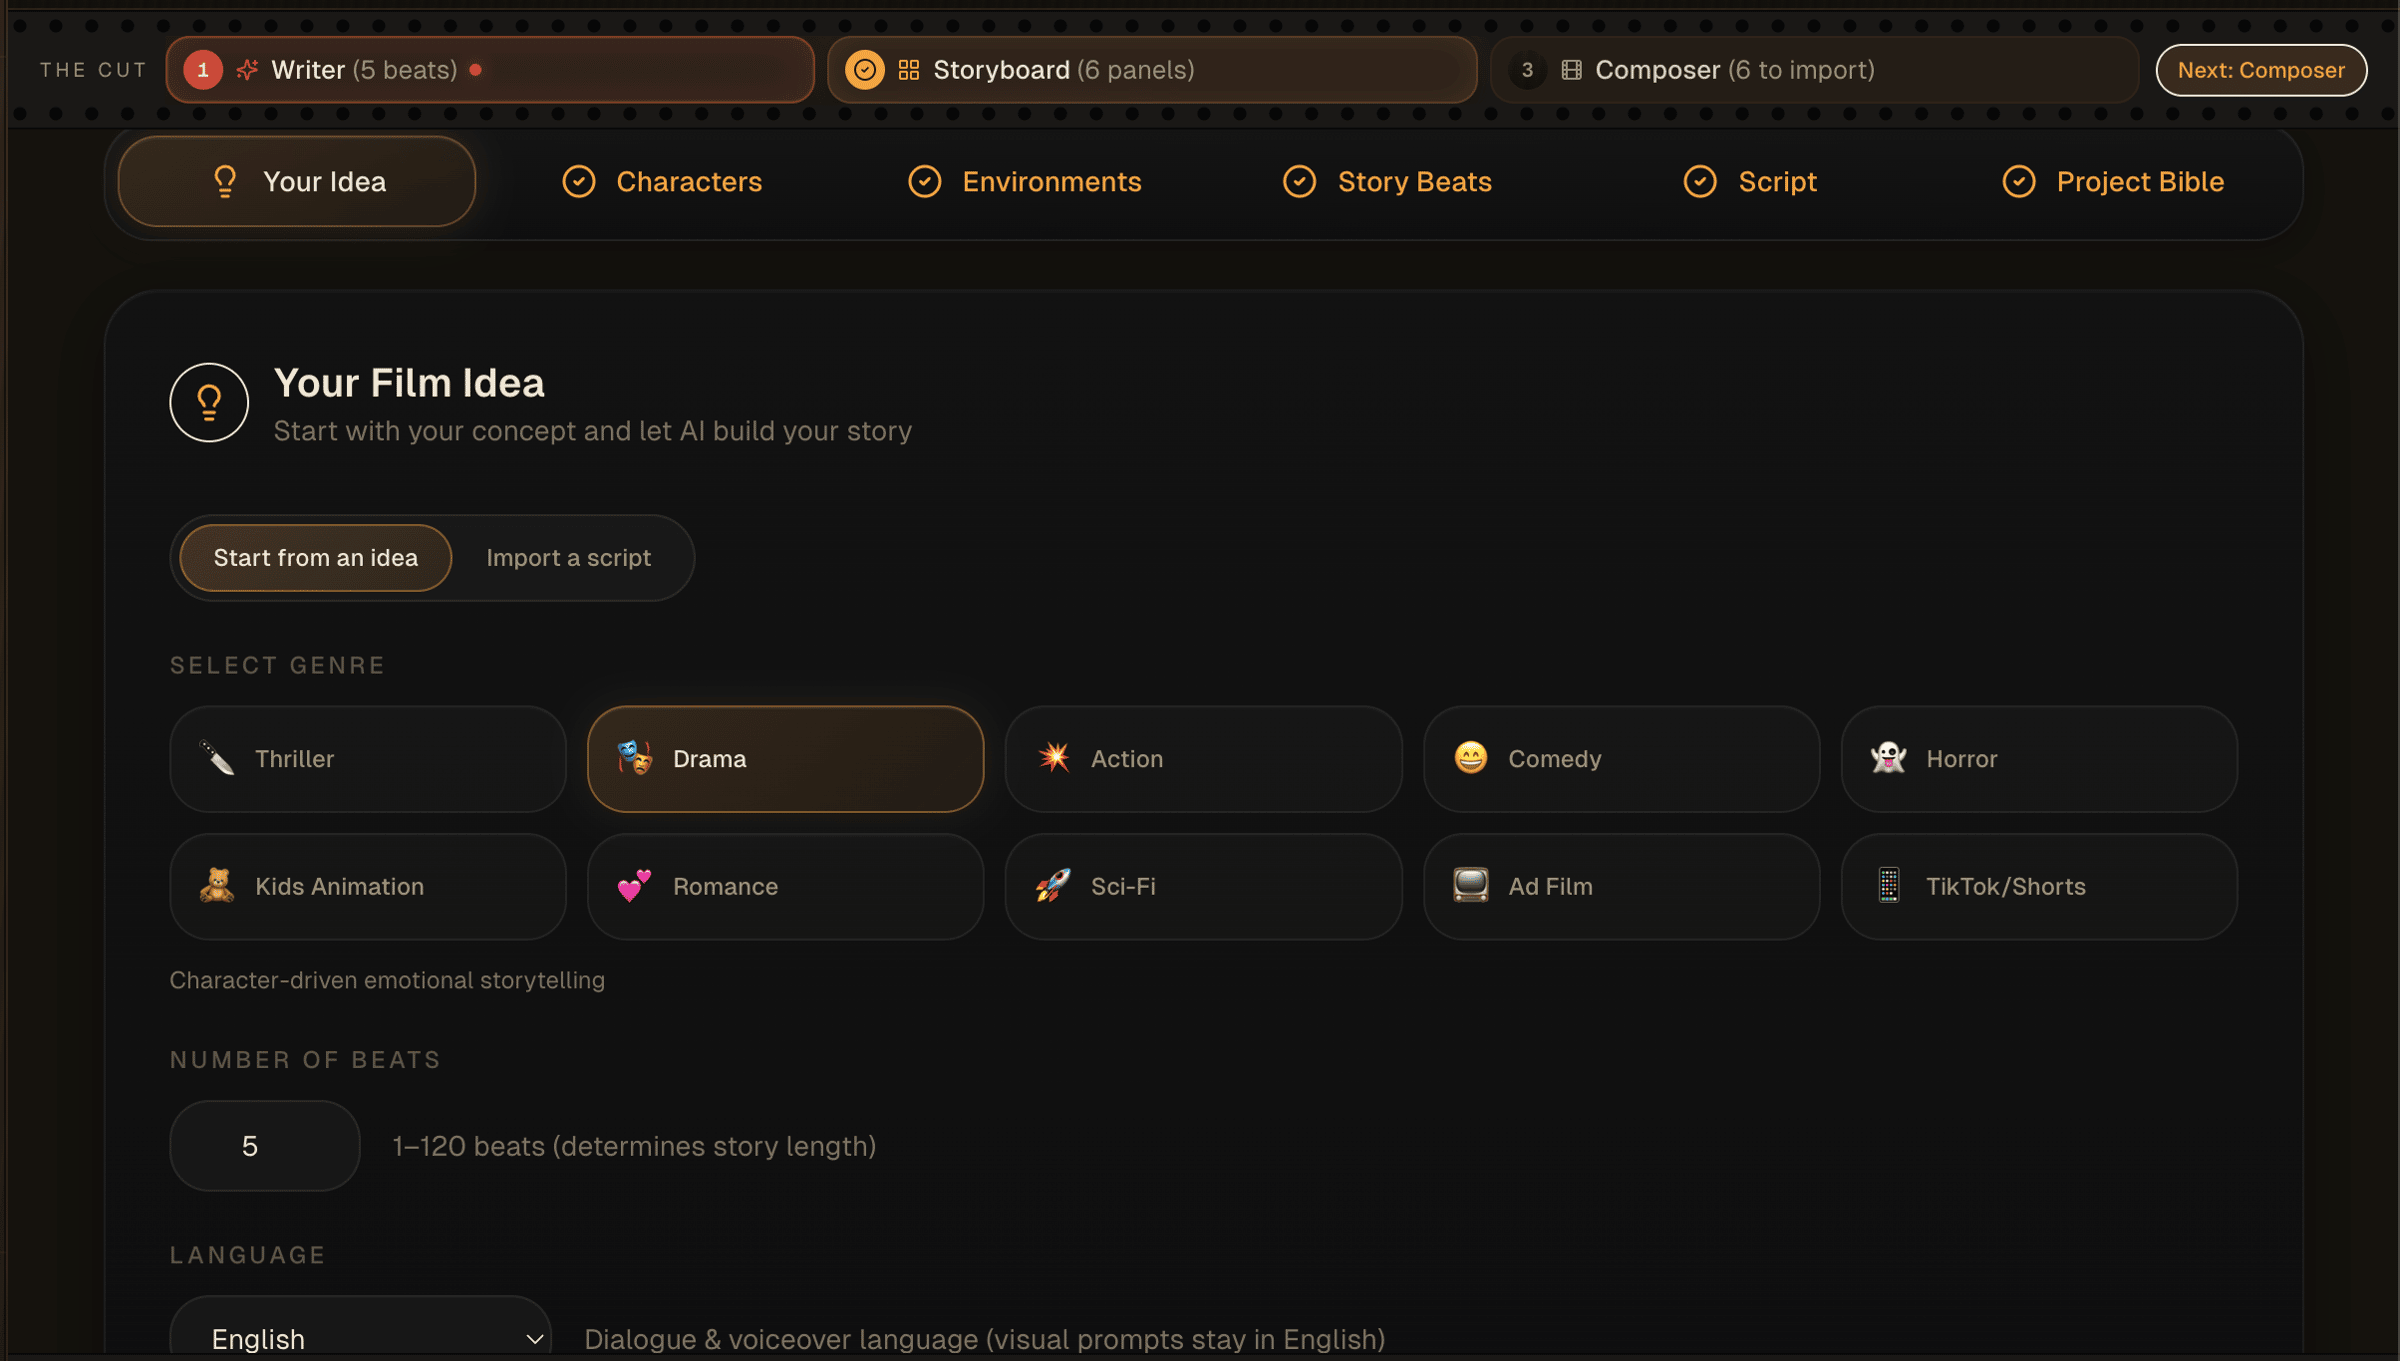
Create a project and open Writer. Choose Start from an idea if you have a concept or logline. Choose Import a script if you already have a screenplay.
When starting from an idea, select the genre and language, enter the number of beats and write the logline. In Frameliq, one beat becomes one scene. A scene can later contain several storyboard panels, so the beat count controls the broad shape of the film rather than its final shot count.
2. Review the story foundation
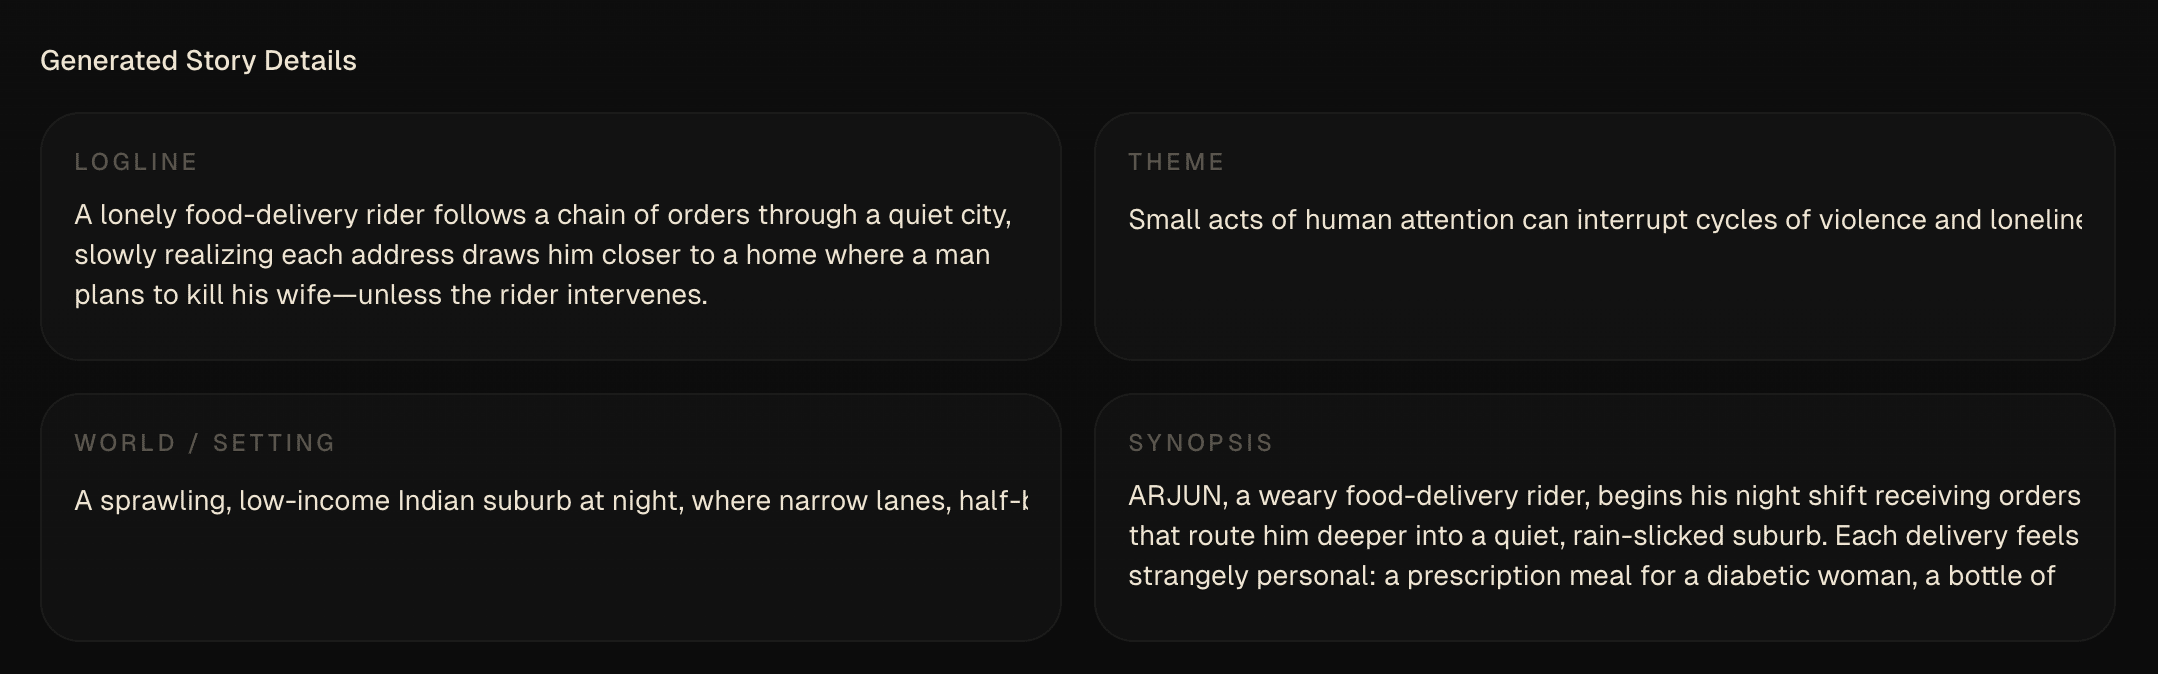
Generate the story foundation, then read it before building the rest of the project. Edit the logline, theme, setting and synopsis until they describe the film you want to make. This is faster than repairing a weak premise after you have generated dozens of frames.
3. Develop characters, environments and beats
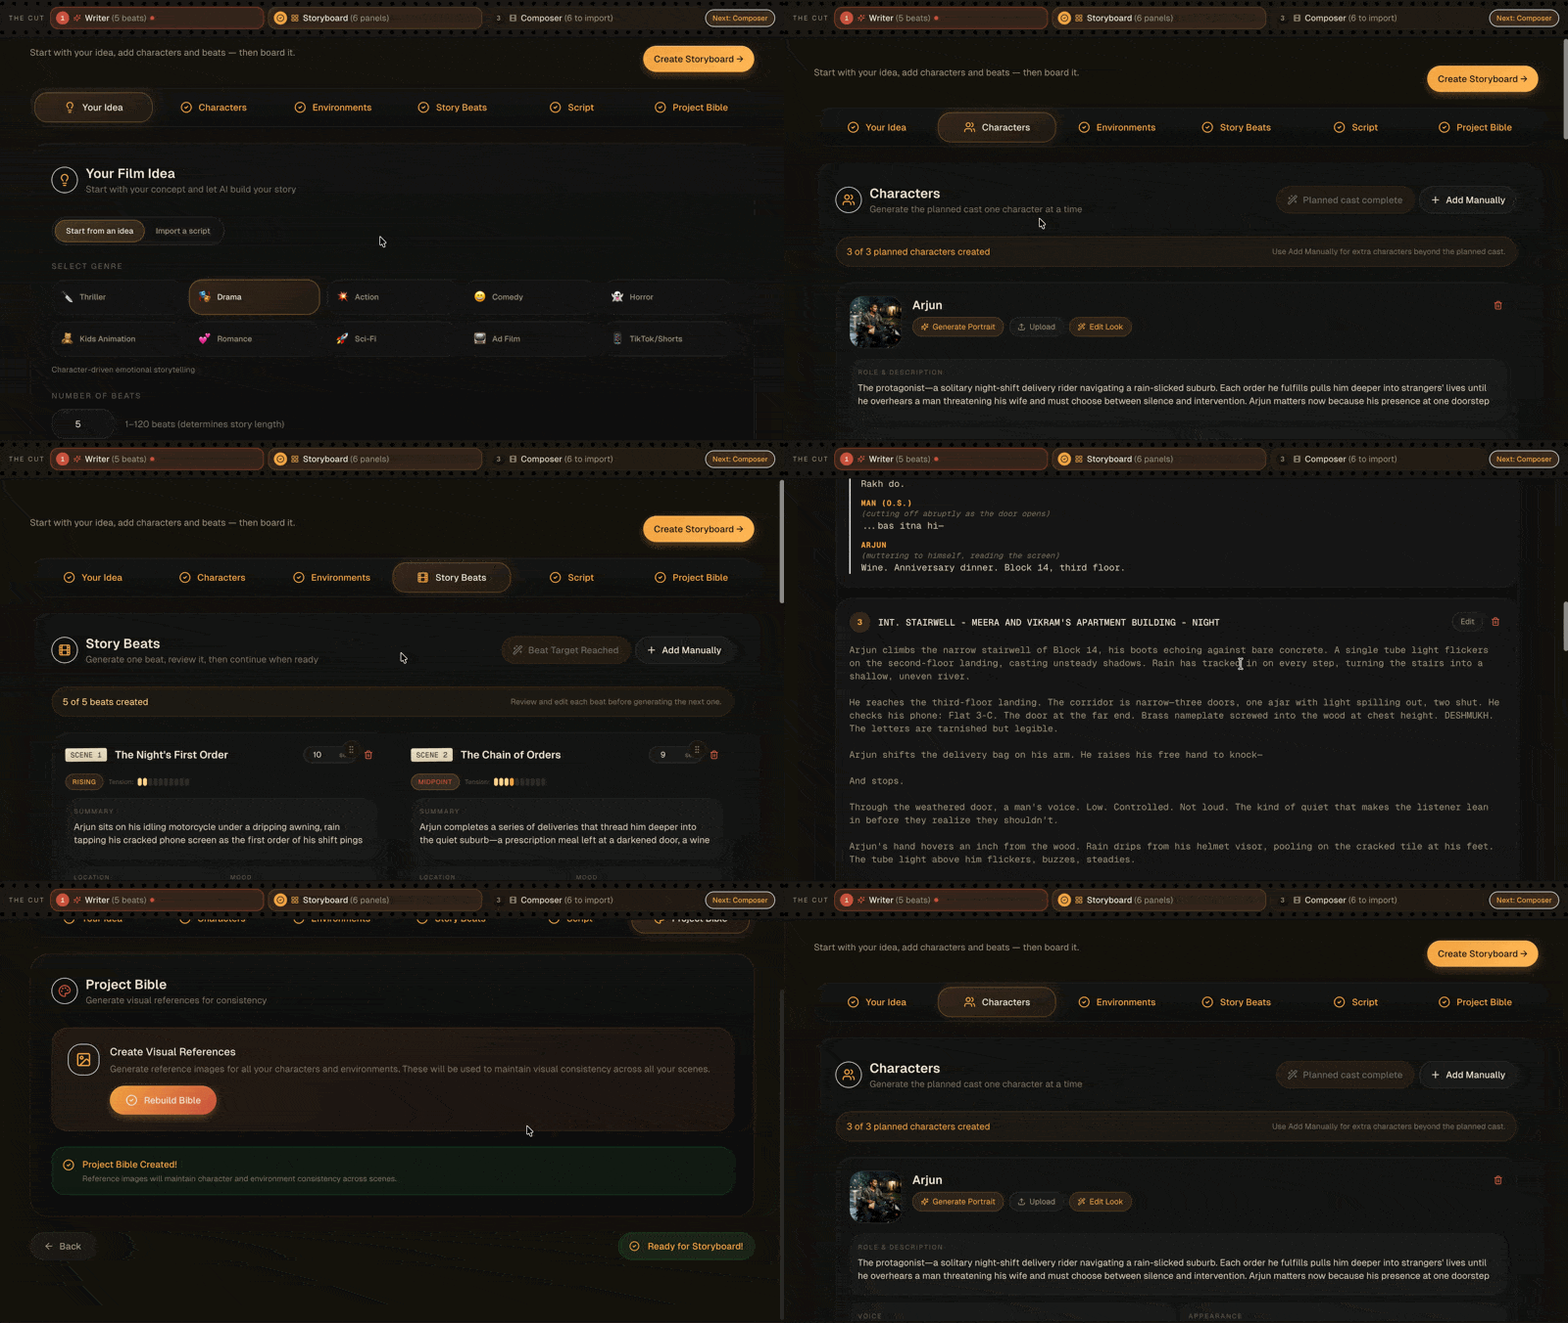
Work through the Writer tabs to develop the characters, environments and story beats. Generate a first pass, then add, remove or rewrite anything that feels generic. Character and environment references created here help later frames stay visually consistent.
Finish by reviewing the script and Project Bible. Names, locations and key visual details should agree before you move to Storyboard.
4. Plan storyboard panels for every scene
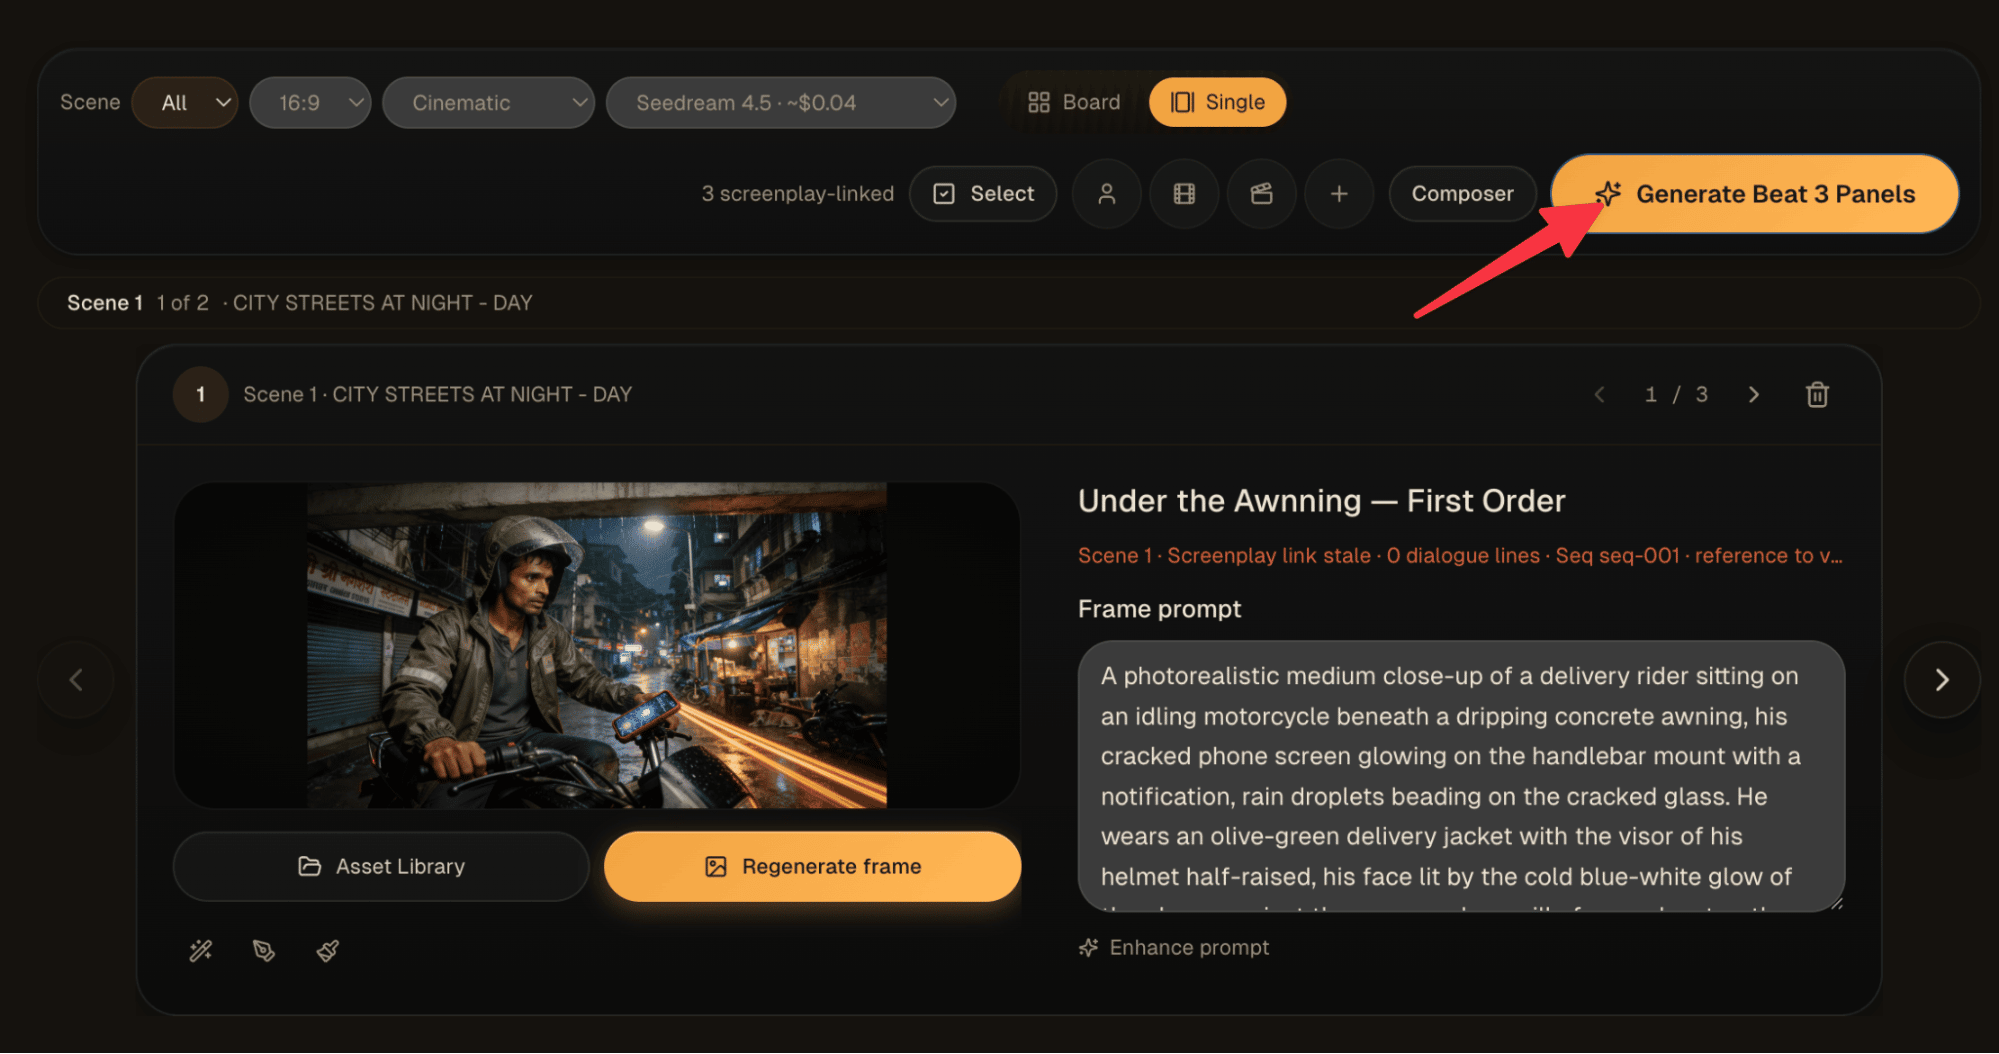
Open Storyboard and generate panels for each beat. Planning the panels uses Story Credits, not image-generation credits. Review the title, prompt, framing and dialogue connection for every proposed panel before rendering images.
You can add a blank panel when you need a shot the planner did not suggest. This is the right moment to fix missing coverage, repeated compositions or an unclear visual sequence. For a deeper planning workflow, read our guide to turning a script into a storyboard with AI.
5. Move between scenes and panels
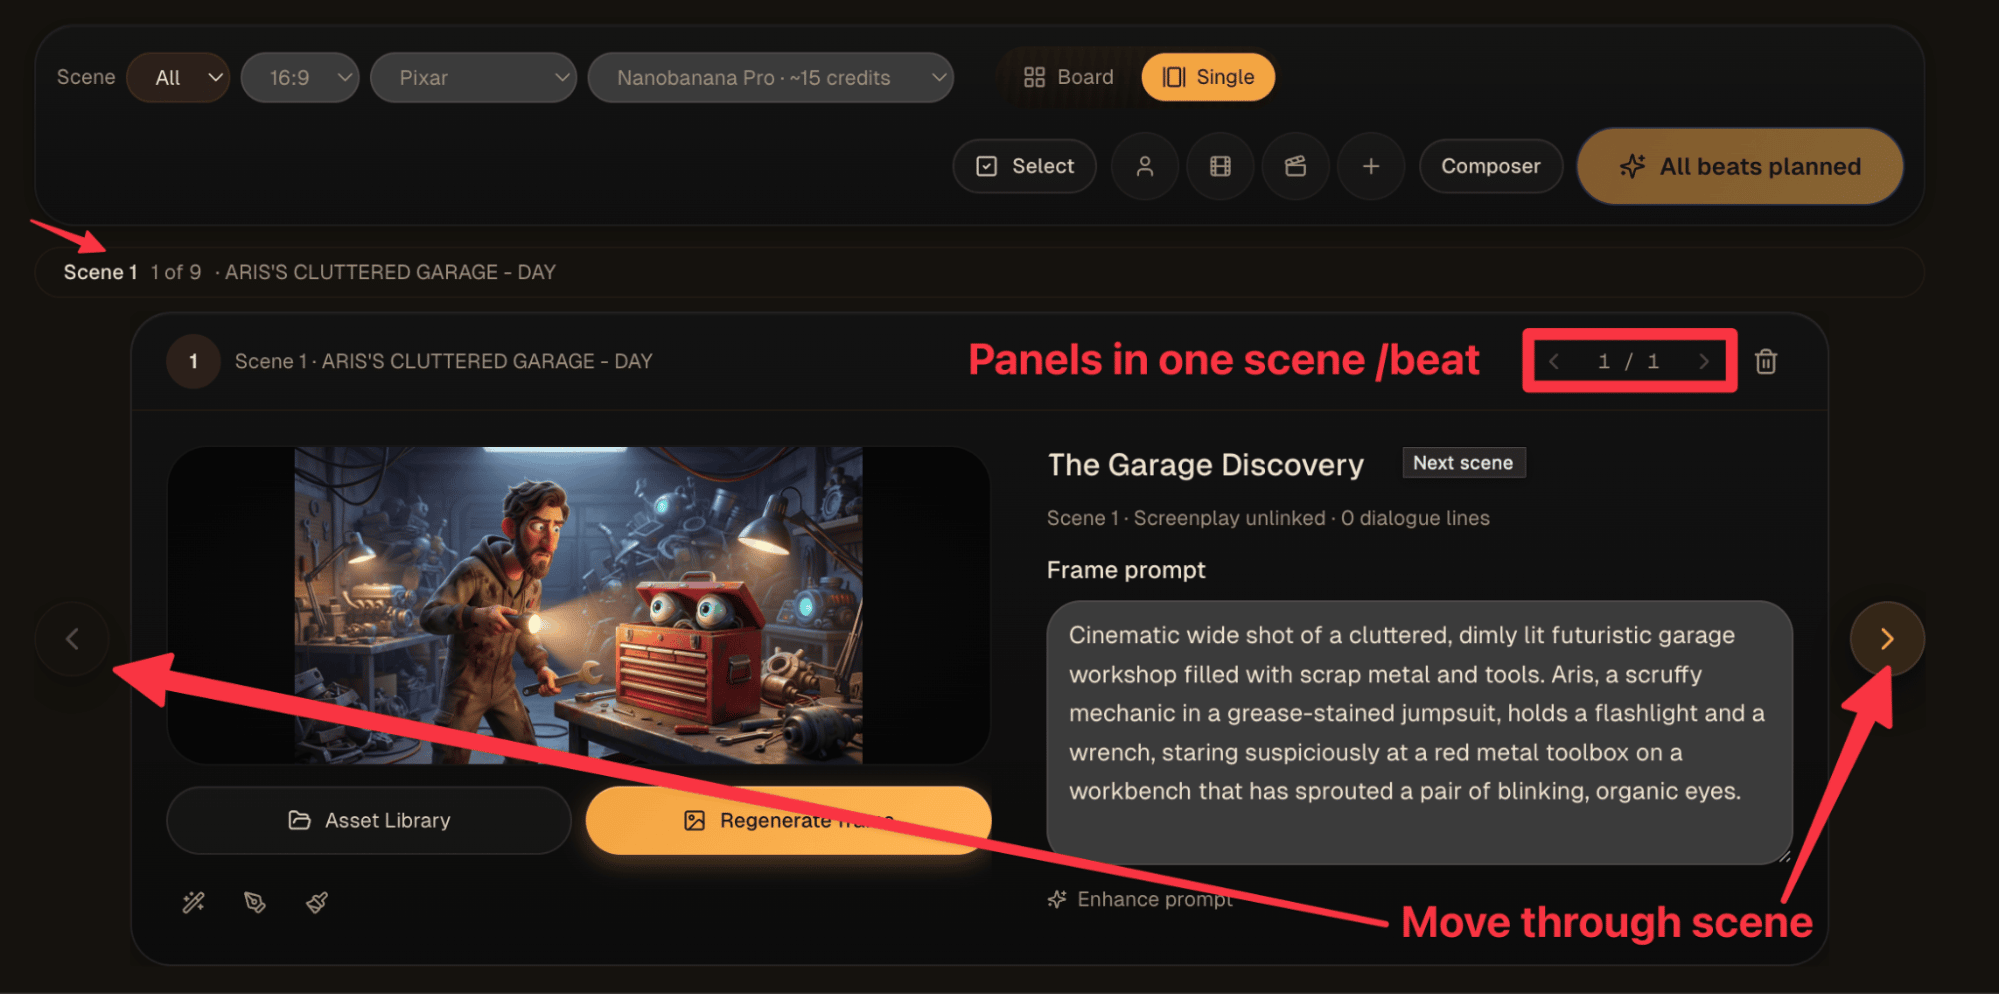
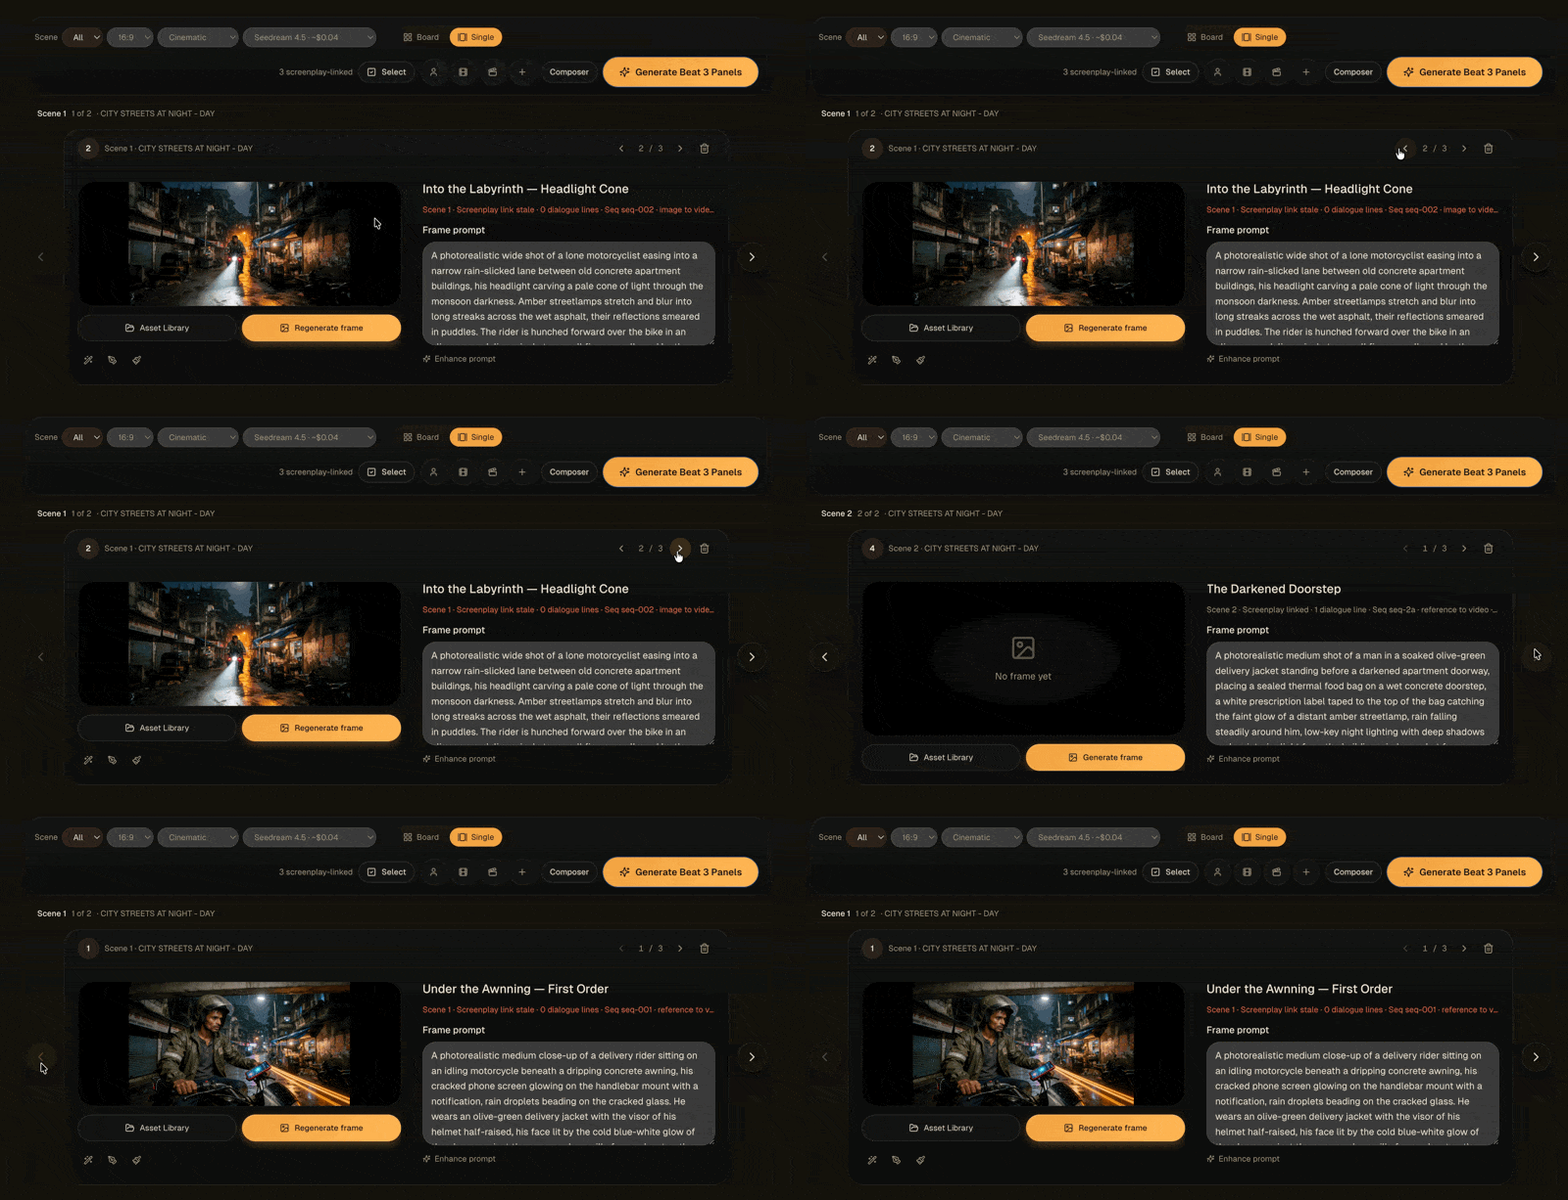
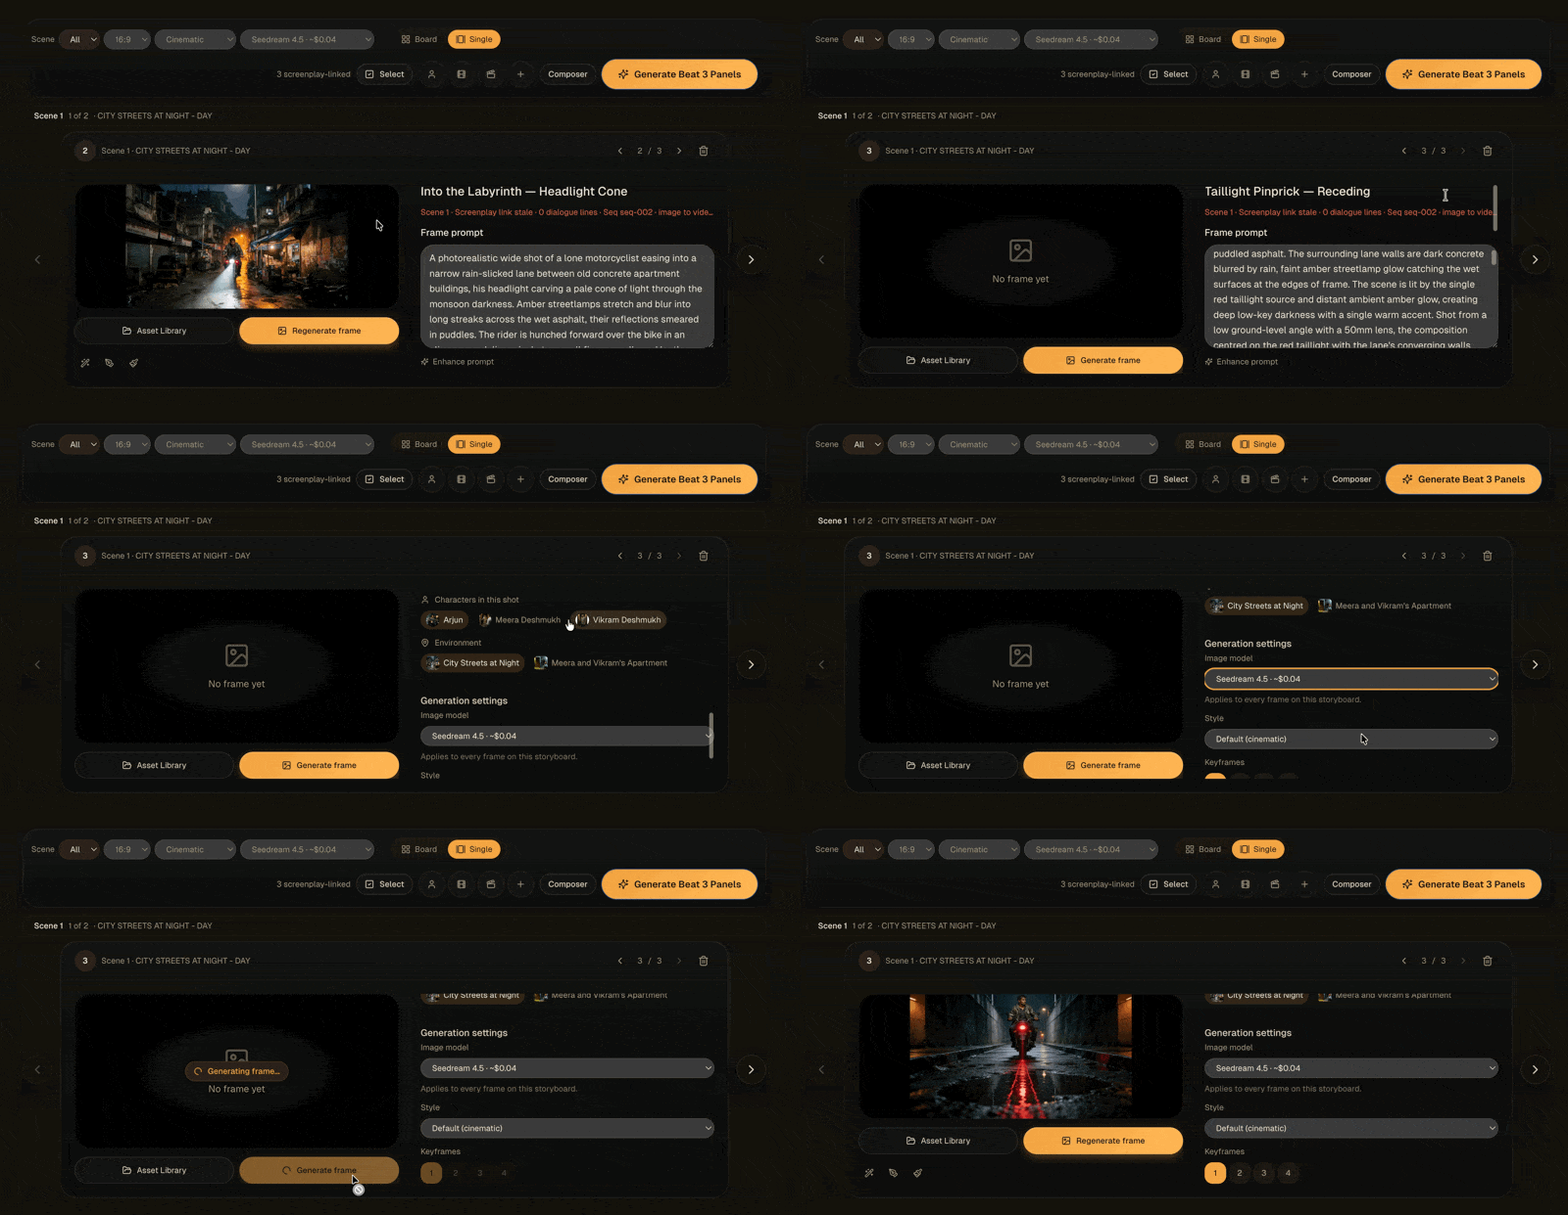
Use the large controls at the left and right edges to move between scenes. Use the smaller previous and next controls in the panel header to move through the panels inside the current scene. The scene label shows where you are in the project, while the panel counter shows where you are inside that scene.
6. Check Board and Single views
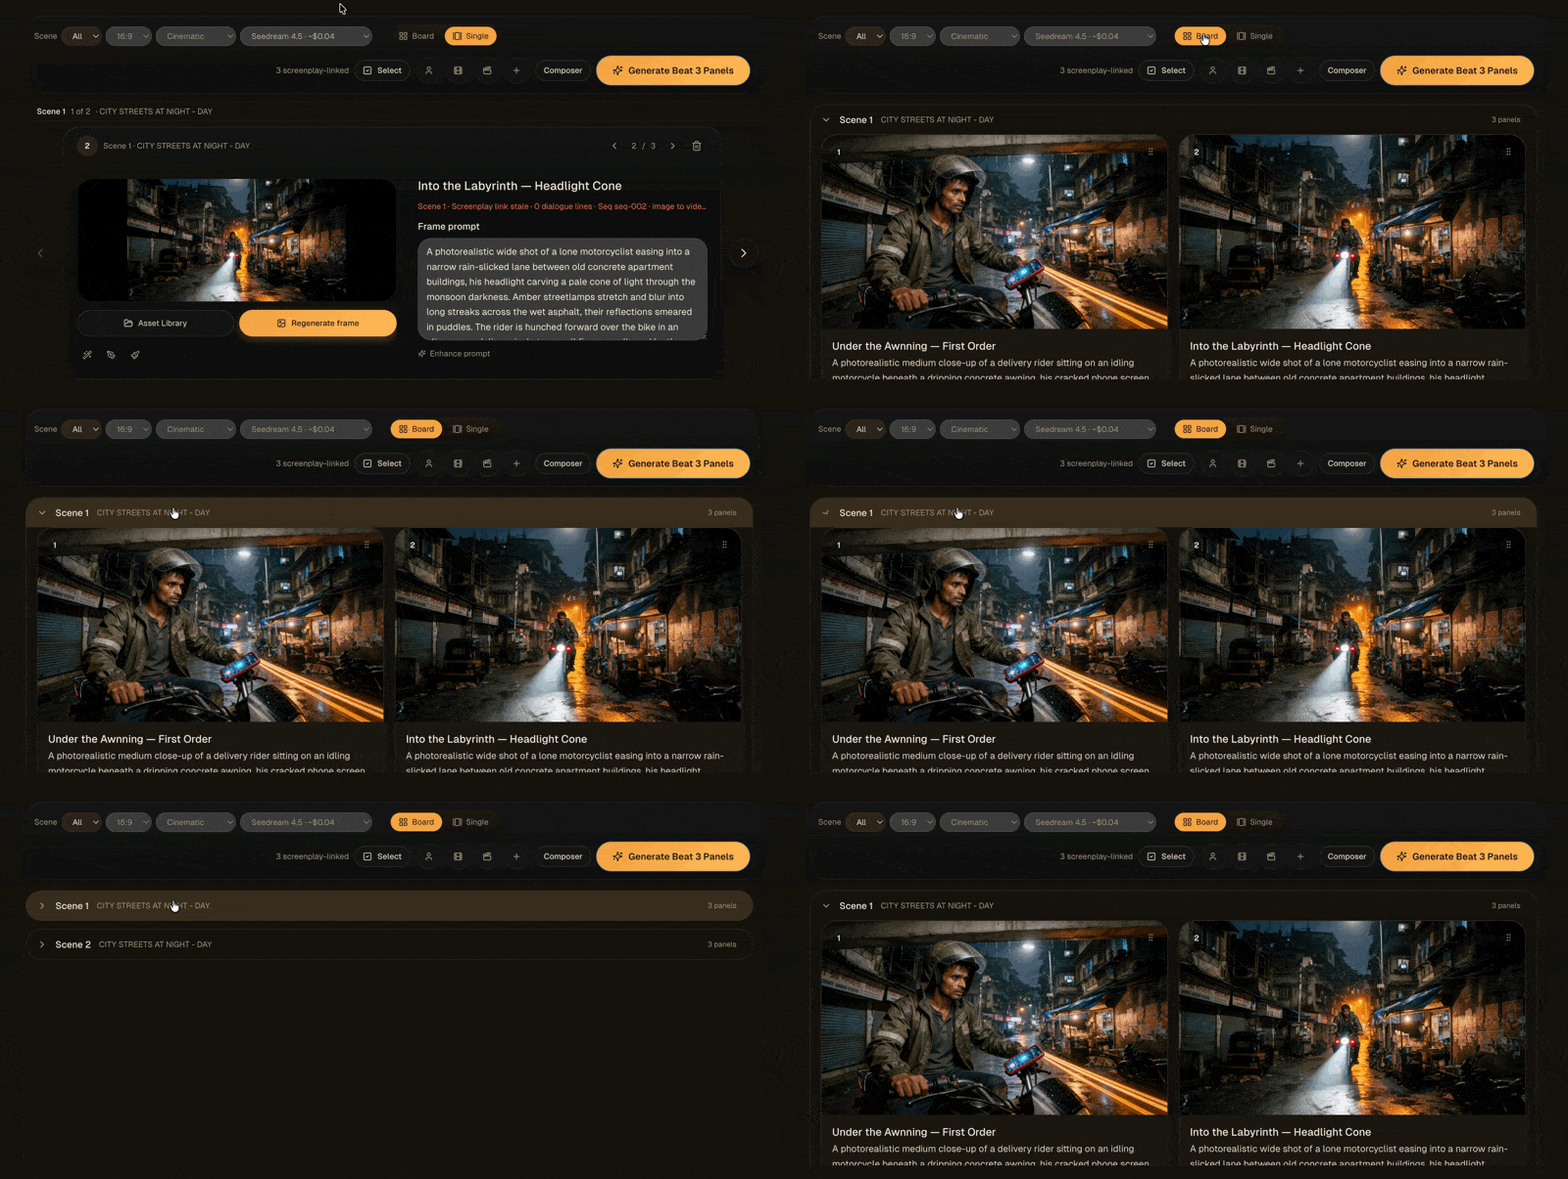
Board view gives you the sequence at a glance. Use it to compare frames, panel numbers, titles, prompt excerpts and scene order. Single view opens the inspector for one panel, including its larger frame, full prompt, screenplay links, continuity details and generation settings.
7. Generate the storyboard images
Once the plan works, generate one frame or select several panels and render them together. The batch action shows the panel count and maximum Media Credit cost before generation starts. If one frame fails, retry that frame without discarding the rest of the board.
Do not approve a frame just because it looks polished. Check character identity, wardrobe, location, screen direction and the relationship to the frames around it. Continuity problems are cheaper to solve here than after video generation.
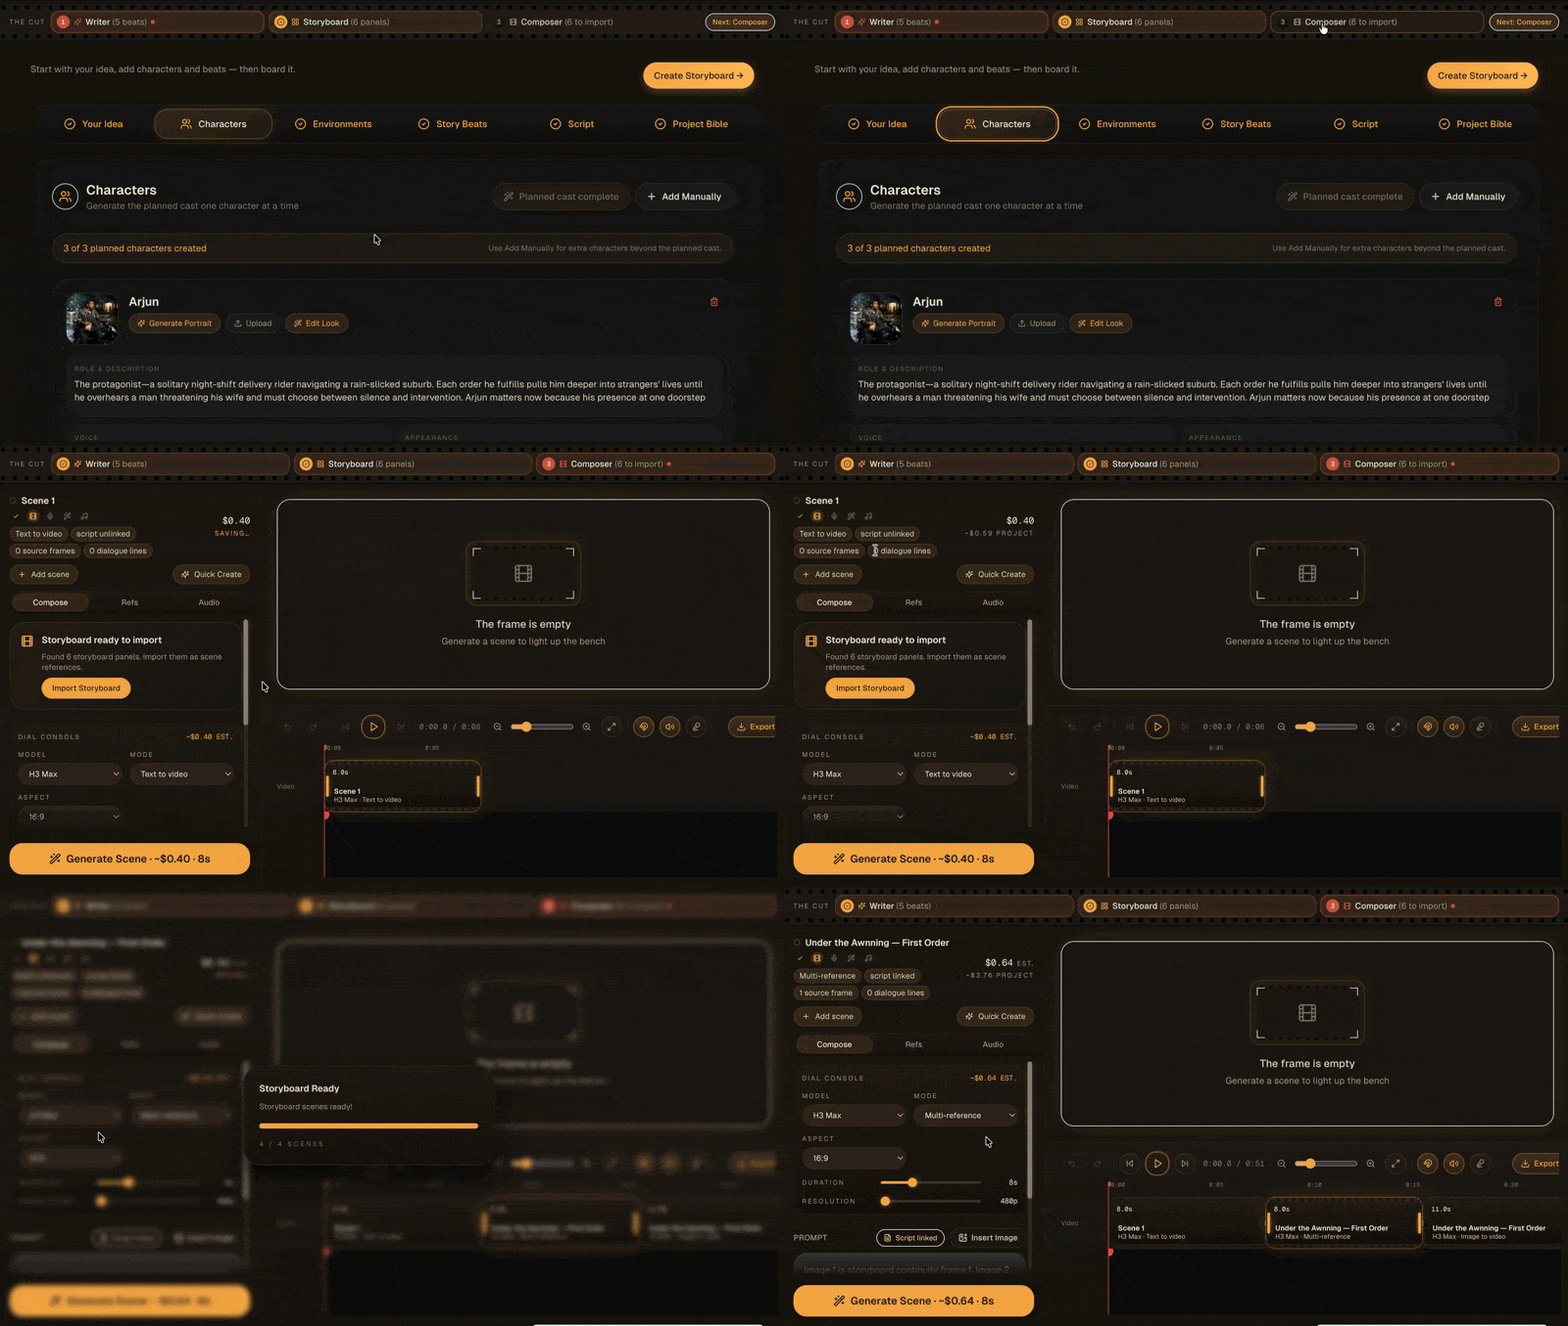
8. Import storyboard scenes into Composer
Open Composer and import the approved storyboard scenes. You do not need to build a Shot Designer plan first. Existing projects that already contain Shot Designer shots still work, but new projects can follow the shorter Writer, Storyboard and Composer path.
9. Choose video settings and generate clips
Open each shot and check its prompt, video model, generation mode, duration, resolution and references. The best settings depend on the shot. A dialogue close-up may need a different model or reference strategy from a wide action shot.
Review the estimate before generating. Keep the versions that fit the surrounding shots, then trim and order the clips on the timeline. You can compare model strengths in our Kling, Veo and Sora guide.
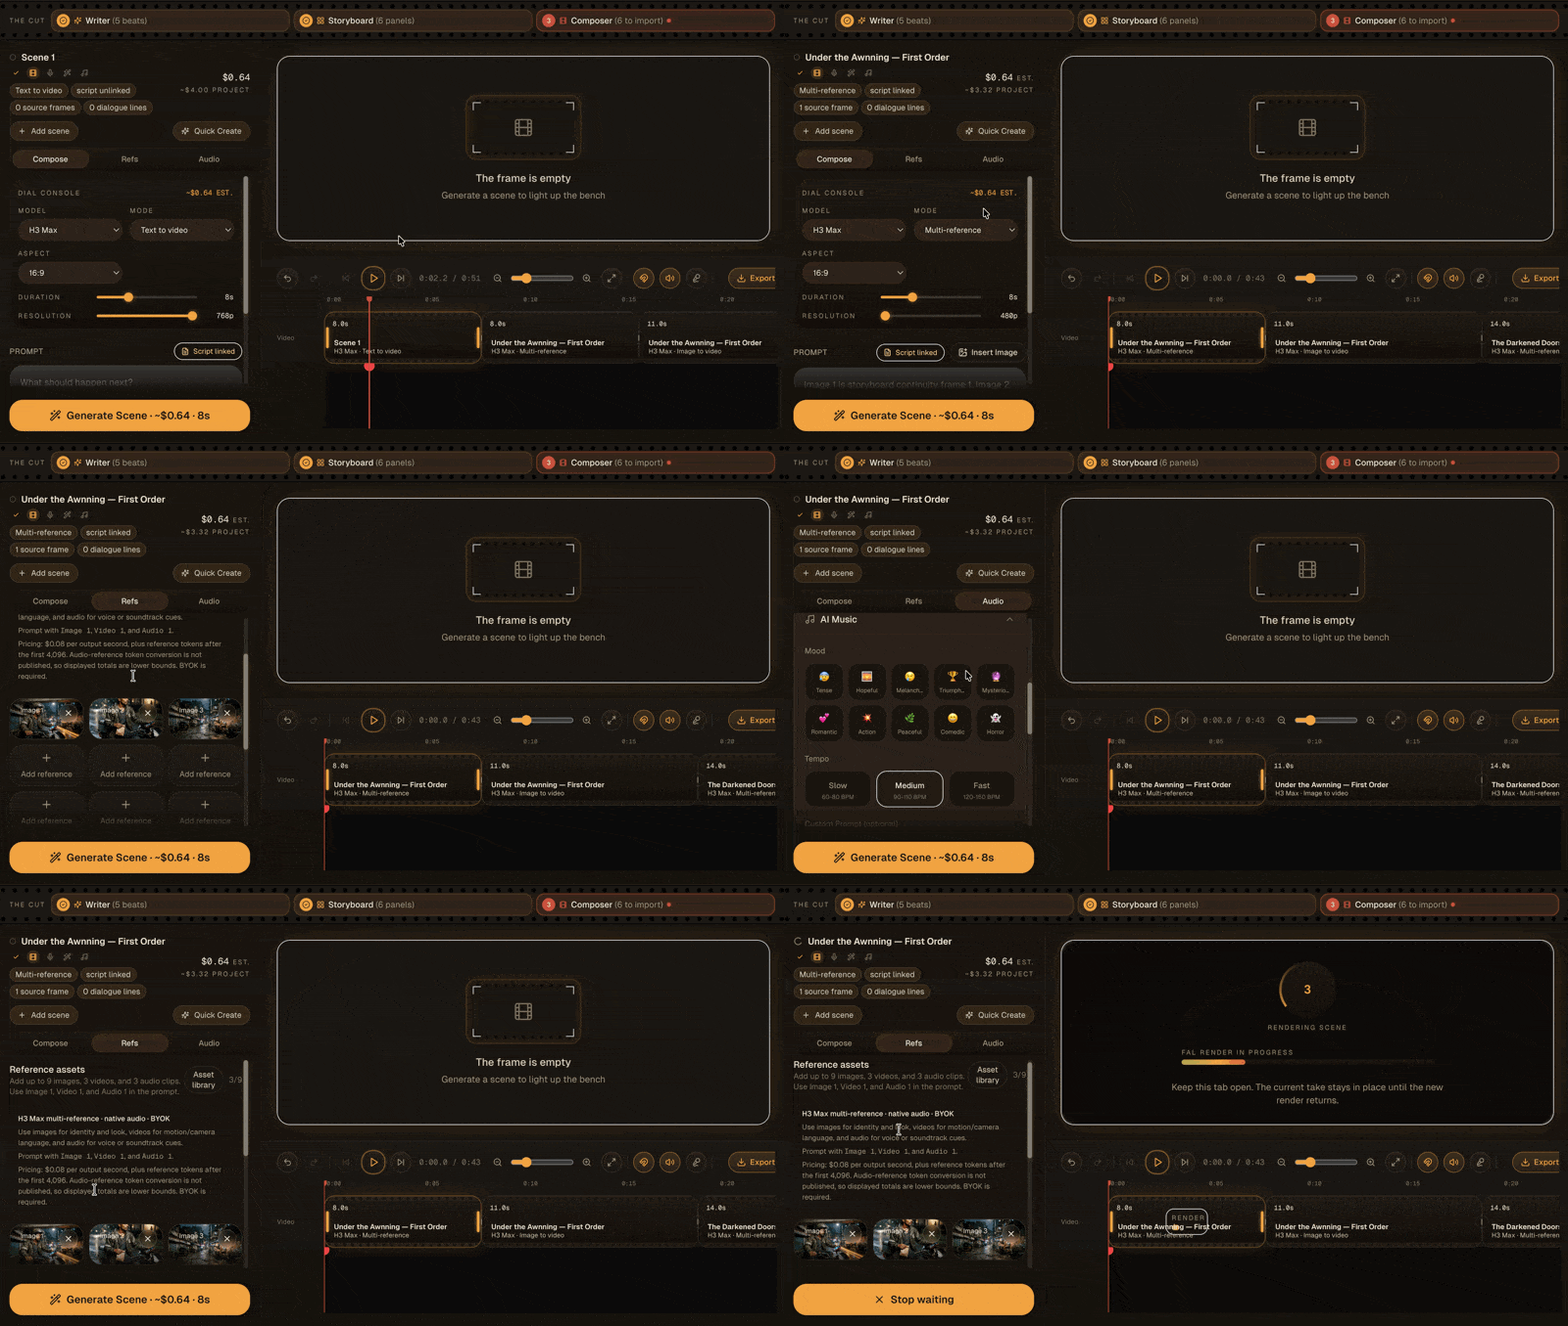
10. Add dialogue, sound and lip sync
Add dialogue, music, sound effects and ambient audio where the scene needs them. Apply lip sync to speaking clips after the picture and dialogue timing are stable. Adjust trims after listening to the whole sequence, not one clip at a time.
When the timeline is finished, export the film. Watch the exported file from beginning to end and check cuts, audio levels, missing frames and the final duration.
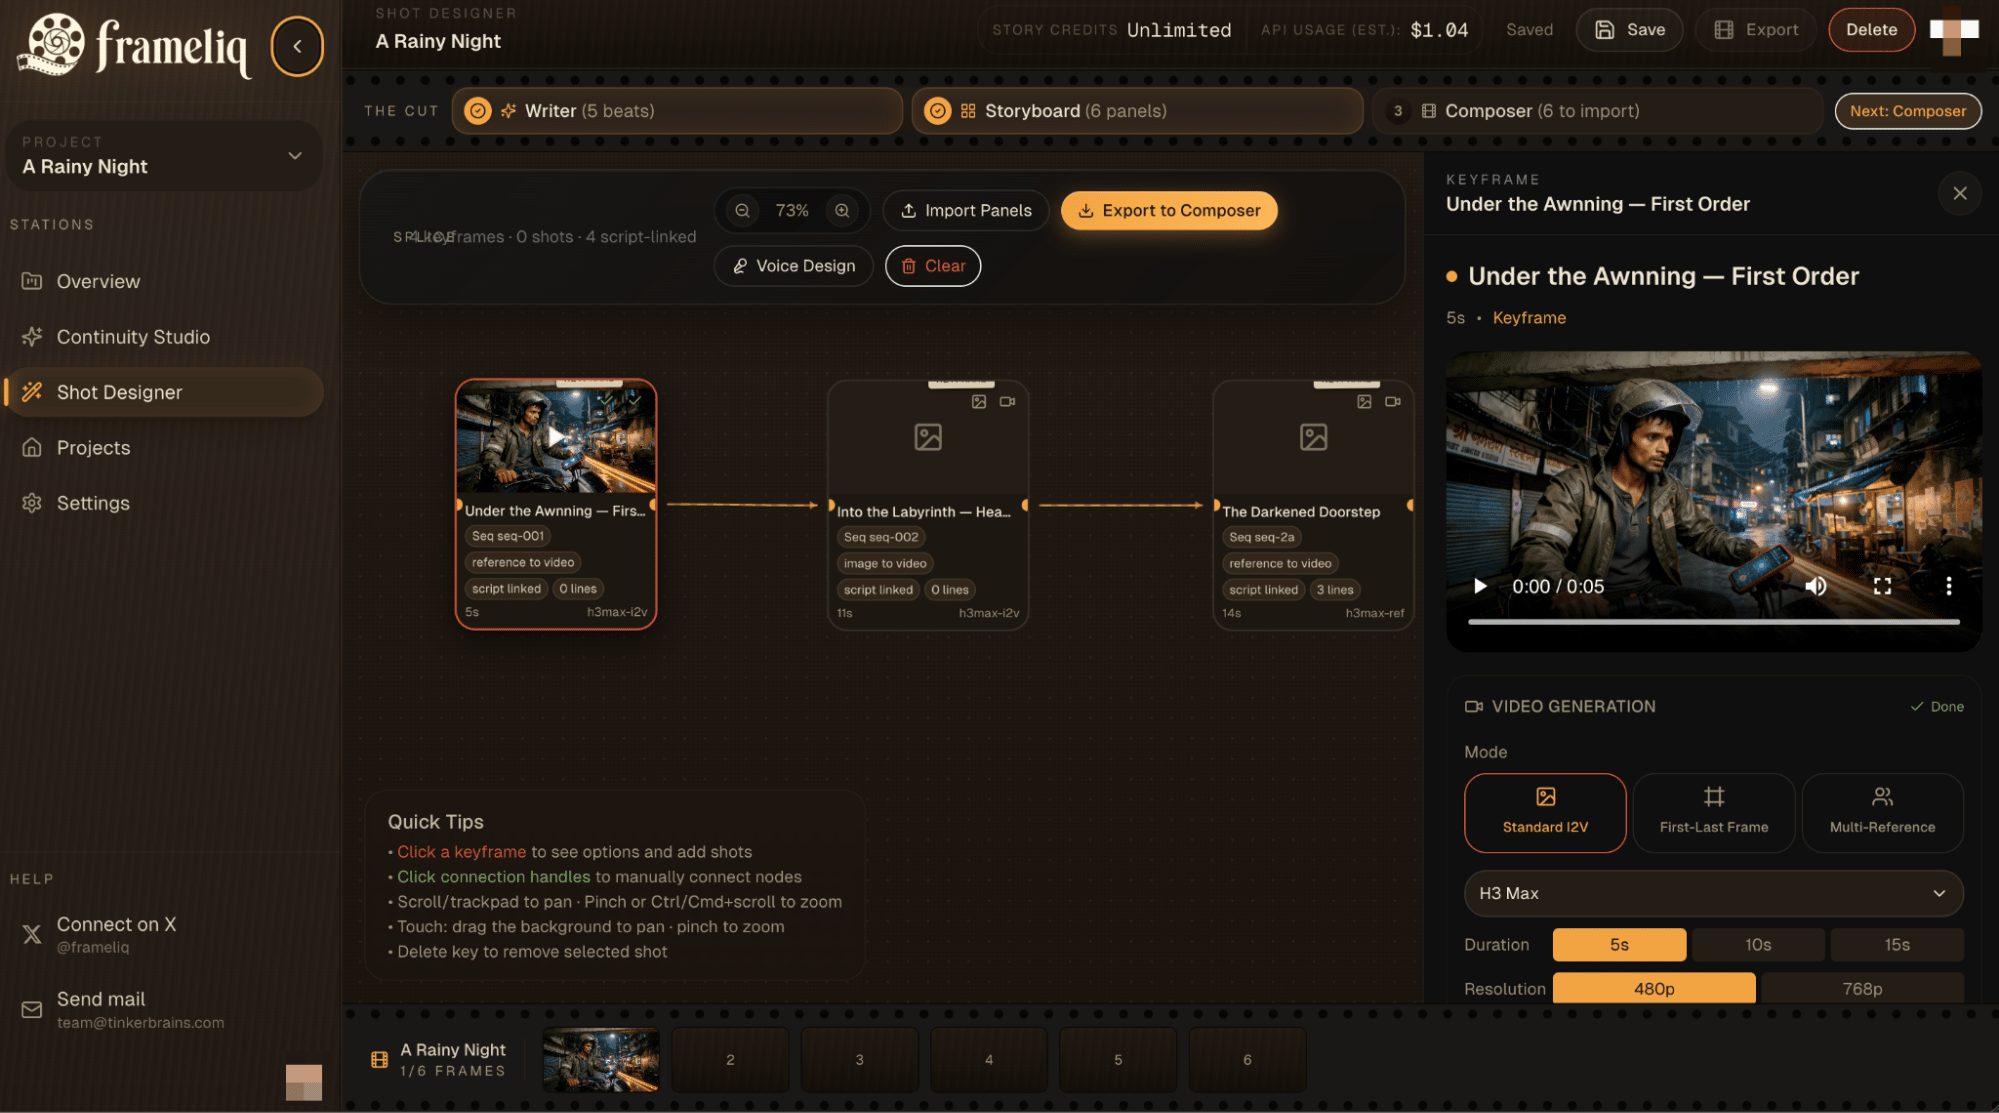
Optional: design an in-between shot
Shot Designer is a precision tool, not a required stage. Open it from the project rail when you want to design how one keyframe connects to another, create extra coverage or control a first-and-last-frame transition. Export the finished shot plan to Composer when it is ready.
A practical checklist before export
- Every scene advances the story or earns its place visually.
- Recurring characters and environments match across shots.
- Video prompts describe movement, not only the appearance of the first frame.
- Dialogue timing and lip sync still work after the final trims.
- Music, effects and ambience support the scene without masking speech.
- The exported file plays correctly from the first frame to the last.
Frequently asked questions
Can I make an AI short film from an existing screenplay?
Yes. Start a project in Writer, choose Import a script and bring in the screenplay. Review the imported structure before generating characters, environments, beats and storyboard panels.
Do I need Shot Designer for every Frameliq project?
No. The main workflow is Writer, Storyboard and Composer. Use Shot Designer only for shots that need a designed transition, extra coverage or precise keyframe control.
Does planning storyboard panels use Media Credits?
No. Panel planning is text generation and uses Story Credits. Rendering the planned images uses Media Credits or your connected provider key. Frameliq shows the maximum batch cost before image generation begins.
What is the fastest way to make a first AI short film?
Keep the first project small. Use a clear logline, a few beats and limited recurring characters. Complete the full Writer, Storyboard and Composer loop before expanding the story. A finished one-minute film teaches more than an unfinished ten-minute plan.
Ready to try the workflow? Start a Frameliq project from an idea or import your screenplay.